

Using Midjourney to Create Stunning Ebook Covers (Part 2)
- Phenomenal Pen

- Jun 12, 2023
- 11 min read
Updated: Sep 24, 2025
How to Combine Images
There are at least two ways to combine images on Midjourney.
1 . /blend
One command that I find both useful and interesting is /blend. I discovered it trying to combine two of my artificially generated cover models:


I even threw in the image of an old comic book cover from Marvel, for reference:

These were the result:


As you can see, the /blend command doesn’t really put two different characters in one image. It just fuses them into one; something that isn’t necessarily bad and has its uses. Imagine something crazier than a labradoodle or a platypus. Perhaps a pandangolin?
Try experimenting with it and you’ll be both blown away and amused by the results.
After you type in /blend, it will allow you to upload two images, with an option to add up to 3 more.


2 . /imagine
A limitation of the /blend command is that you can’t add any text prompt, only images. But if you want to use both images and text, you can use good old /imagine.
First, you need to learn how to upload images to Discord and then get the image link.
Click the plus sign next to the space to input text and then choose “File”.


Basically, you’re uploading the image into the chat with the Midjourney bot so you can assign it a URL.
For both external images and Midjourney-generated images already in the DM chat, click on the image to expand it, then right-click and choose “Copy image address”.
The process might be a little different if you’re using the app:
Desktop = Right-click on the image and select "Copy Link" (NOT "Copy Message Link").
Mobile = Tap and hold on the image, then select "Copy Media Link."
If you’re still having trouble, try clicking on the image to expand it and select “Open in Browser” at the bottom of it. Then copy the image URL.
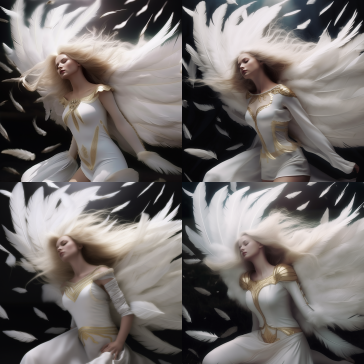
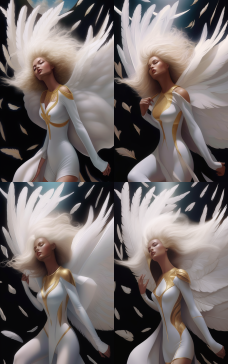
Second, add the image URL to your prompt. Type /imagine and then right-click and paste the URLs, followed by your usual text prompt.
e.g.
https://...png https://...png upside-down falling angel girl, beautiful with golden hair, green eyes and white armor, complete with cinematic lighting and falling feathers around her sideview closeup on face red lips
Press Enter.
Note: With /imagine, you can upload from just 1 to 5+ images. You can also skip typing a text prompt if you want to give the Midjourney bot more artistic license to do as it pleases with the images.
I use this technique to upload a single image for the Midjourney bot to use as reference. This can help it understand faster what I want to describe.
For instance, I get an image of a costume from an online shopping website such as Amazon and then tell Midjourney what I want:


Creating Deepfakes Responsibly
Like I said in the first post, being able to create images that blur the line between real and fake is an integral part of generative AI. It’s next to impossible to extricate this function or control all the repercussions in the real world. For instance, the user who created the images of Trump being arrested was subsequently banned from Midjourney. I believe that Deepfakes are and will remain a gray area for a long time to come.
But if you just want to have a bit of fun, you can try this experiment on your own. You can use the How to Combine Images techniques above and a picture of yourself or your friends.
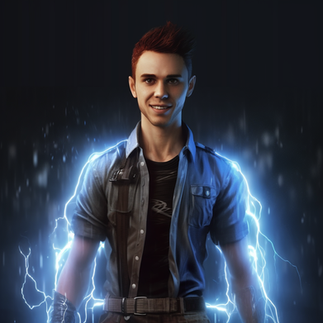
For instance, I uploaded a picture of myself and then typed the prompt: “/imagine this man as a sixteenth century samurai warlord”.

“/imagine this man as James Bond --niji 5” (for an anime feel)

“/imagine this man as a futuristic cyborg

“/imagine this man as a cowboy riding a horse in the Old West”

Are you getting Multiverse of Madness vibes? LOL!
Other Commands
I’m not going to go into detail with every command because this article would be much too long. But here are two other commands that I personally find indispensable:
/info = View information about your account
/prefer = Change default settings
In particular, I like the command /prefer remix because it sometimes feels like with every variation of the original image I make, I get farther and farther away from my vision.
Toggling Remix Mode enables you to change something in your text prompt every time you click the Variation button. This means that you can edit an image that you already like in order to change the lighting or some crucial element of it, all while preserving more of the original image.
To activate the Remix Mode, type /prefer in the text space, click /prefer remix and then press Enter on your keyboard. You will receive a notification if you’re successful.

Now, every time you click the Variation or Redo button, you will get a new pop-up where you can edit your text prompt.

When pressed, the Variation and Redo buttons will appear green as a reminder that the Remix mode is active.

It will remain active until you type the /prefer remix command again.
Personally, I prefer to keep the Remix Mode on because I like the ability to edit my text prompts between every generation.
Suffixes
Apart from the slash commands, there are many parameters you can add at the end of your prompt string to adjust the image generation job. Here’s a complete list of them:
Personally, I’ve found aspect ratio, no, raw and niji 5 very handy.
Aspect ratio means the width to height ratio of an image. By default, Midjourney creates images that are square in shape i.e. with an aspect ratio of 1:1. Ebook covers, on the other hand, have an aspect ratio of 1:1.6.
Because the aspect ratio parameter only accepts whole numbers, we convert 1:1.6 to 10:16.
If you want to give it a try, type at the end of your prompt:
--aspect 10:16
or
-- ar 10:16.


Outside Midjourney, when you finally add the title and author name to your cover, you need to trim off or overlay some of the height anyway. Of course you can always opt for a square image and just adjust it in relation to the title and author name on your 1:1.6 cover.
If you want to go back to Midjourney’s square aspect ratio, just don’t include the aspect parameter in your next prompt.
The No parameter will make the AI try to remove an item or a group of items from the image.
For example, if you don’t like the eagle in an image like this:

Just add:
--no eagle
at the end of your prompt.
The style raw parameter is useful to tilt the balance of control between you and the AI. In the latest version of Midjourney, namely 5.1, the bot is able to understand text prompts better, sometimes even with very short descriptions as input. In order to do this, it was necessary to let the bot form opinions on its own. In a word, the Midjourney bot is now more “opinionated” than its previous version.
By activating RAW mode, you’ll be able to make the bot less opinionated, resulting in a lessening of the default Midjourney aesthetic. This works well for users who want more photographic images, for example.
At the end of the prompt, just add --style raw.
The Niji model of Midjourney draws from anime styles and aesthetics. It’s perfect for all the otakus out there.

To produce images just like the ones above, just add --niji 5 at the end of your prompt.
AI isn’t Perfect
Amid all the awe and excitement, it’s worth keeping in mind that AI isn’t perfect. Don’t expect it to do all the work for you.
Like I said in the TL;DR section, the Midjourney bot can’t understand fonts at all and only writes a language of its own. It’s notorious for being terrible at drawing hands, resulting in too many fingers or weird contortions:


Speaking of contortions:

Eat your heart out, Exorcist!
I like to call them glitches, Aside from extra digits, watch out for extra limbs:


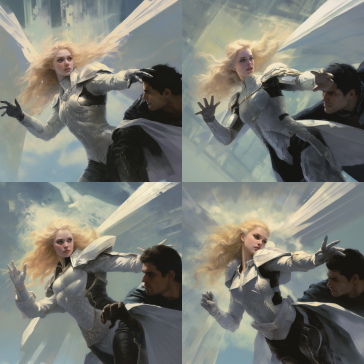
I once spent 20 tries to get the bot to understand “falling feathers” for background:


From my experience, it doesn’t understand the concept of upside-down either:

Almost enough to give you nightmares, aren't they?
You’ll definitely feel the occasional frustration when you hit a wall. I’ve been there. Dealing with AI isn’t always a straightforward process. You probably noticed similar issues while chatting with ChatGPT.
A human cover designer would’ve grasped what you wanted to say much faster. Then again, there’s no human designer who can match the speed that AI creates the images. Also, aesthetic-wise, it’s a very expensive hit-and-miss as well trying to find a designer that suits you. On the other hand, the Midjourney bot is proficient in so many art styles and techniques, dare I say going as far back as the dawn of mankind; from da Vinci to Rembrandt, from Osamu Tezuka to Jim Lee, from Monet to Pollock.
Tinker with your Text Prompts
The best approach that I’ve found is to keep fine-tuning your text prompts. Midjourney, after all, thrives and depends on natural language descriptions to create. As a writer, you should see the task as a challenge for you to write detailed but clear prompts.
For instance, you can add words like “hyperrealistic”, “hyper-detailed”, “photorealistic”, “sunset/ cinematic lighting”, “neon lights”, “uplight” etc.
You can also specify:
Medium: folk art, graffiti, watercolor, pencil sketch, charcoal sketch, pixel art, abstract etc.
Genre: cyberpunk, post-Apocalyptic, anime, fantasy, horror etc.
Time period: Victorian era, 1990s, eighteenth century etc.
Emotions: determined, sleepy, shy, embarrassed, angry etc.
Famous artists or works: Ghibli, Lord of the Rings, Tim Burton, Wes Anderson etc.
For instance, I created these images using the same prompt (“a little girl and a giant robot Teddy Bear”) in various styles:
Cyberpunk + post-Apocalyptic

Anime (Niji model)
Tim Burton

Wes Anderson (non-robotic)

Lord of the Rings (non-robotic)

Ghibli (non-robotic)

Downloading Your Images
It’s easy to download your image once you’ve Upscaled it. Just click the button marked “Web”, select Yep! in the pop-up warning box and you’ll be taken to the Midjourney web app. Look for the diskette icon and click it. Your image will automatically be downloaded to your device.
On the same page, go to Home and you’ll be able to see your gallery, all the images that you’ve Upscaled and everything else. Ta-da!
If you go to Explore, you’ll see the Midjourney community feed and all the hottest artworks created by other users.
Copyright Concerns
Like what I said above with regards to deepfakes, the issue of copyright on AI-generated images is very tricky. It’s a can of worms that the entire human race will have to untangle sooner rather than later.
I asked ChatGPT (i.e. Bing) this same issue a couple months back and this was how the conversation went:
Me: Speaking of originality, who owns the copyright for the poems you create?
Bing: The author of a poem is the owner of the copyright. Once you create an original work and fix it, like taking a photograph, writing a poem or blog, or recording a new song, you are the author and the owner.
Me: Does AI infringe on copyright when they create a poem?
Bing: AI does not have any rights under copyright law and therefore there is no legal obligation to indicate that AI was used to generate the work. However, it is still recommended to indicate that AI was used to help create a work to be transparent with your audience.
Me: I mean, can AI be guilty of violating copyright?
Bing: Yes, AI can infringe on copyrighted work. For example, if an AI is trained on copyrighted images and then generates new images that are very similar to the copyrighted images, this could be considered copyright infringement.
Me: How does AI know when they infringe on copyright?
Bing: AI does not know when it infringes on copyright. It is up to the owner of the original work to determine whether AI-generated work is infringing on their copyright.
For your purposes as a self-publisher though, suffice it to say that you’re not violating any laws. In fact, your paid subscription guarantees you the freedom to “use your images in just about any way you want”, according to the Midjourney TOS (Terms of Service).
On a lighter note, those of you with eagle eyes might have noticed that there’s a faded watermark on one of the artworks I generated with Midjourney, what I call the Maze Apple:

If you magnify the image and try to read the words, you won’t be able to because it’s gibberish.
It’s the Midjourney bot’s artist signature!
Midjourney doesn’t always do this, which has led to some Midjourney subredditors theorizing that the AI has become sentient.
I personally don’t think it’s a sign of the end of times and that Cyberdyne Systems, Skynet and Terminators are on the horizon. (For an in-depth Sci Fi imagining of a true Super AI, check out my novel Discomfort Zone.)
The artist’s signature on the Maze Apple was likely just because of a certain combination of words I used in my original prompt i.e. “by so-and-so”.
In any case, I think it’s a cool autograph to keep!
Final Thoughts and Verdict
I’m an artist through and through. I also did a lot of visual art when I was young, before I decided I was going full-time as a writer. Midjourney reawakened this creative passion in me, which had been lying dormant for so long because of the steep learning curve and price of high-end equipment in certain visual art fields.
Pro photographers, for instance, know a lot of technical stuff that other people don’t and that stuff can still give them a huge edge on using Midjourney. Here’s an example of their additional prompt: “with studio light, hyper-detailed, on black isolated plain, pro color grading, white lighting, Shot on 70mm lens, Canon camera, 8k” etc.
But for average people like us, including those whose talents lie elsewhere, the barrier has been lowered by Midjourney.
Having said that, Midjourney isn’t a silver-bullet solution, nor is it a one-stop service that will turn up a finished ebook cover. In the end, just like in any cover design project, your concept and vision as the author of your work must prevail. Nothing is stopping you, for instance, to cram your cover with as much content as you want (something that’s very easy to do with Midjourney). But you should review and keep in mind the basics of good cover design.
In today’s digital world, a lot of media are constantly competing for people’s attention. The tiny screen size of a smartphone is the ultimate arena. It follows that any book cover will be reduced to thumbnail size, and any miniscule detail that an author has been obsessing over (e.g. the color of the protagonist’s eyes, the model of motorcycle in the background etc) will become insignificant.
The reader’s eye has also become very good at spotting what looks amateurish. And nothing screams amateur than a convoluted book cover with disparate elements that don’t gel well together. Usually, this happens when the author tries to represent the story too literally on the cover. This is why it’s best to aim for covers that embody the principle of “less is more.”
Let your cover concept evolve while in the process of image generation. Don't get hung up on one vision that's too convoluted and hyperdetailed. From my experience, working with generative AI is a collaborative process. Be open-minded and let the bot surprise you. Adapt and improvise.


P. S. As mentioned above, use the /info command at any time to view information about your account. The popup will also show you your remaining GPU time (Fast Time Remaining) and your subscription type.
Just as with many online services, Midjourney has automatic renewal turned on, so please be mindful of when your subscription expires and the next renewal date. Before the renewal date comes, be sure to decide whether you’ll continue the subscription for another month or even a full year.
Should you decide to cancel your subscription before renewal, you can do so by going to:
All your generated images will not be deleted if you do so.
Similarly, you can upgrade your plan at any time and choose whether the upgrade should be effective immediately or at the end of the current billing cycle.
Check out my LitRPG story titled The King of Quantum


Comments